Age decides which of these ornaments is yours: craft stick trees and handprint Santas suit preschoolers, while 3D paper snowflakes, origami stars and folded book pages ask for the patience of older kids and adults, and the rhinestone brooch stays an adult project because of the hot glue.
Materials run from paper and book pages to ceramic, craft sticks, peanut shells and dried orange slices.
1. Handprint Santa Ornaments
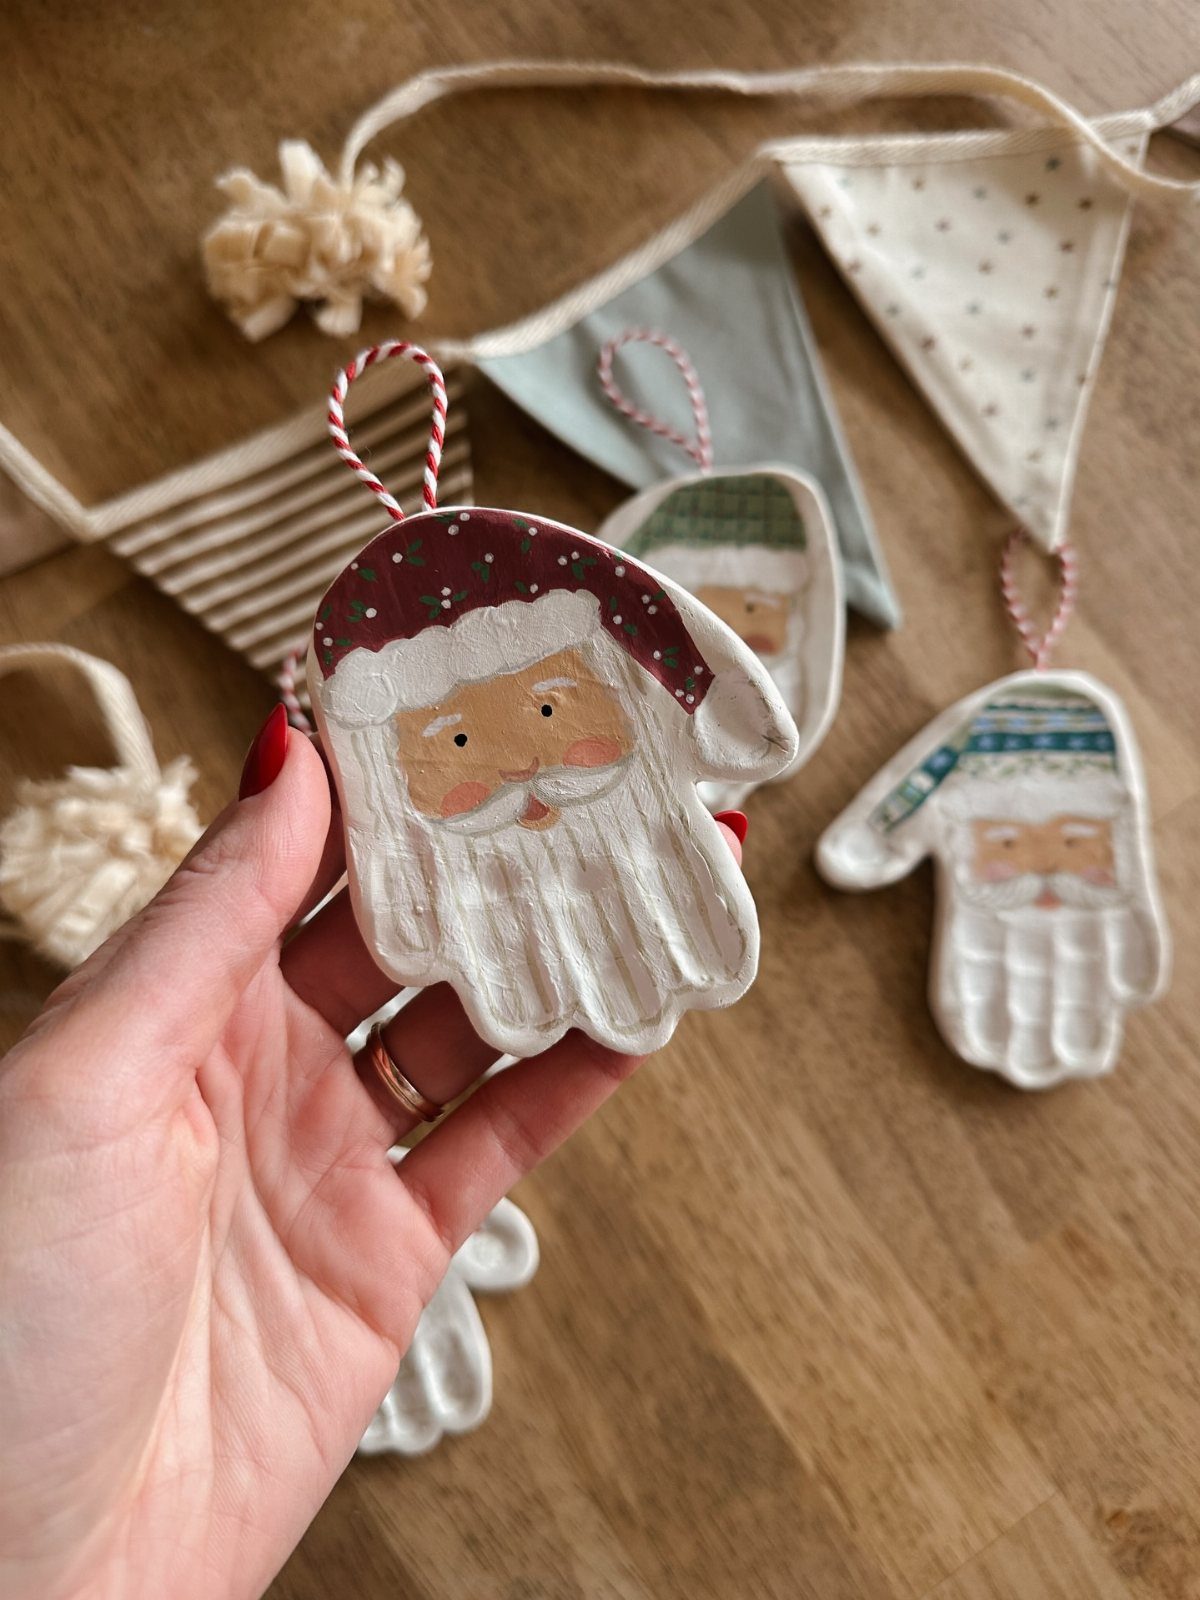
A handprint Santa works because the hand does the hard part: the palm becomes the face area and the fingers become the beard.
Paint the hat red and the beard white, and a small hand makes a sweet keepsake that costs very little.
Pick clay or ceramic if you want it to last for years. Write the child’s name and the year on the back, since handprints change fast and you will want to know which one is which.
2. Glitter Ornaments
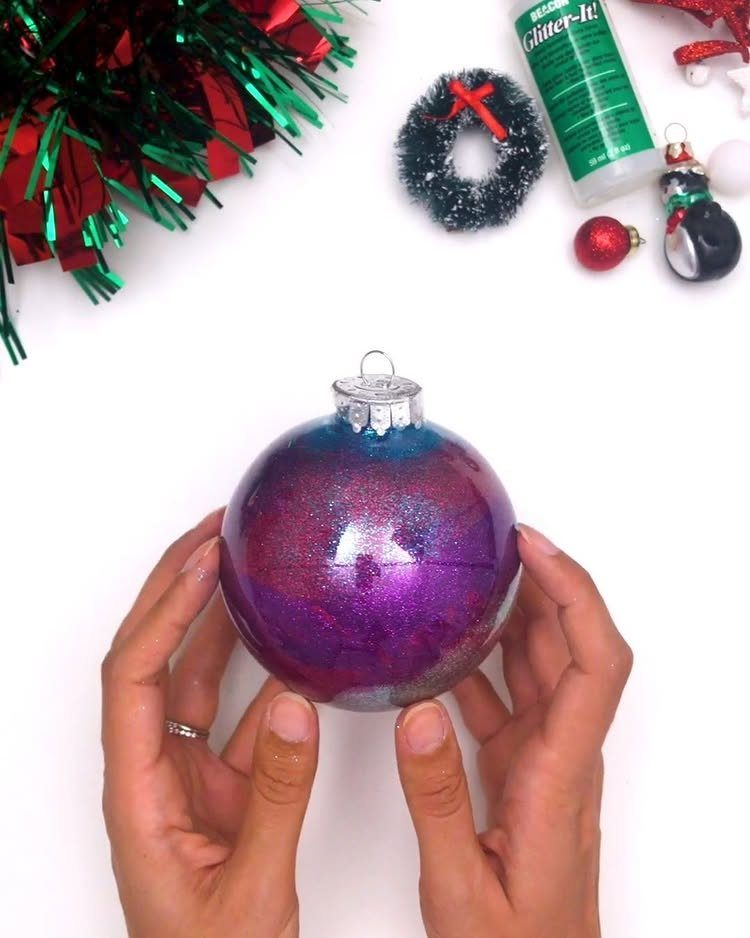
Clear ornaments are the cheapest blank canvas in the craft aisle, and glitter turns one into a keepsake in minutes. Purple and pink look good together, and the glitter sits inside the ball where it stays put.
Work over a tray or a sheet of paper so extra glitter can be poured back into the jar. Kids can handle this one, though I would keep the vacuum nearby.
3. 3D Paper Snowflakes
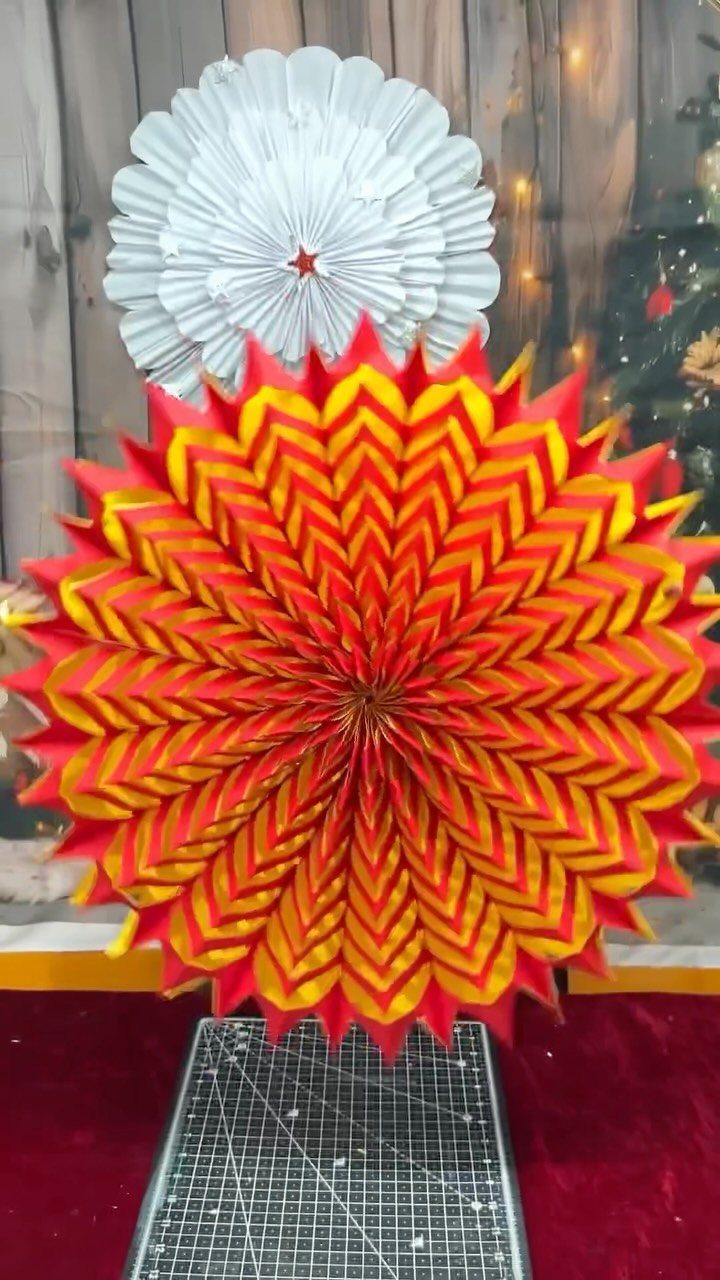
Pleated paper snowflakes in 2 colors, like red with yellow, stand out on a tree because the layers add depth that flat cutouts lack. Paper is cheap, so this is an afternoon project that costs almost nothing.
Make one in a solid color first.
Once the folds feel easy, pair 2 colors and layer them so the contrast reads from the front. These suit older kids and adults more than toddlers, since the precise folding takes patience.
4. Origami Stars
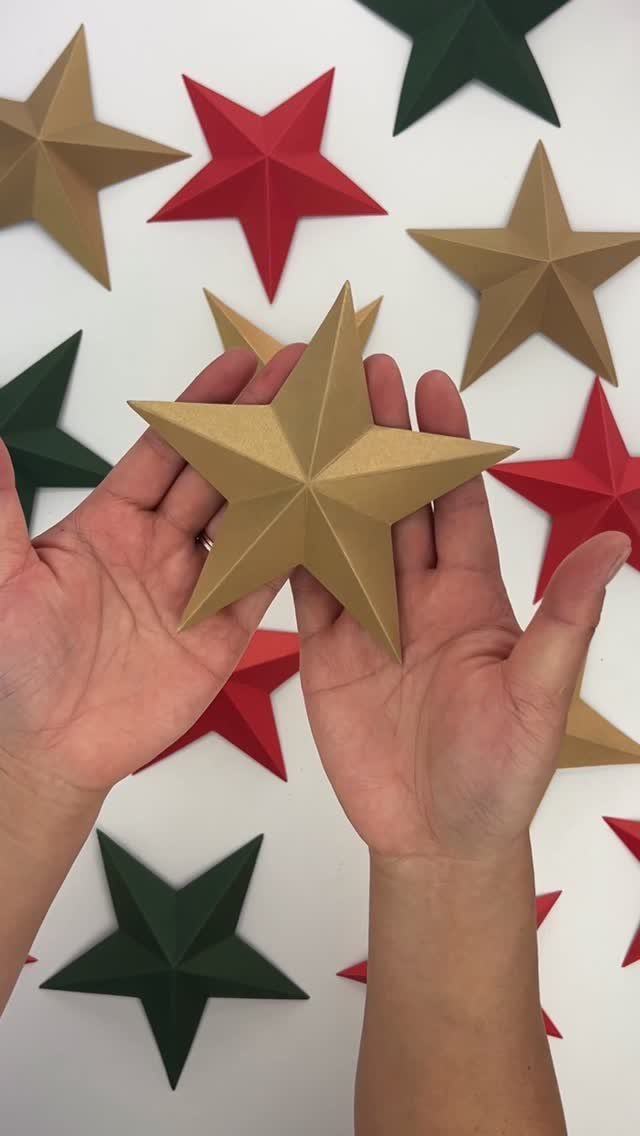
Score lines are what turn a flat paper star into a 3D one, according to its maker, who says to add simple creases to any star cutout. That means you can start with a star template you already own.
Gold paper gives the richest look, with red and green mixed in for contrast.
A ruler and the back of a butter knife work for scoring. Fold along each line before you glue or string it.
5. Dried Orange Slice Ornaments
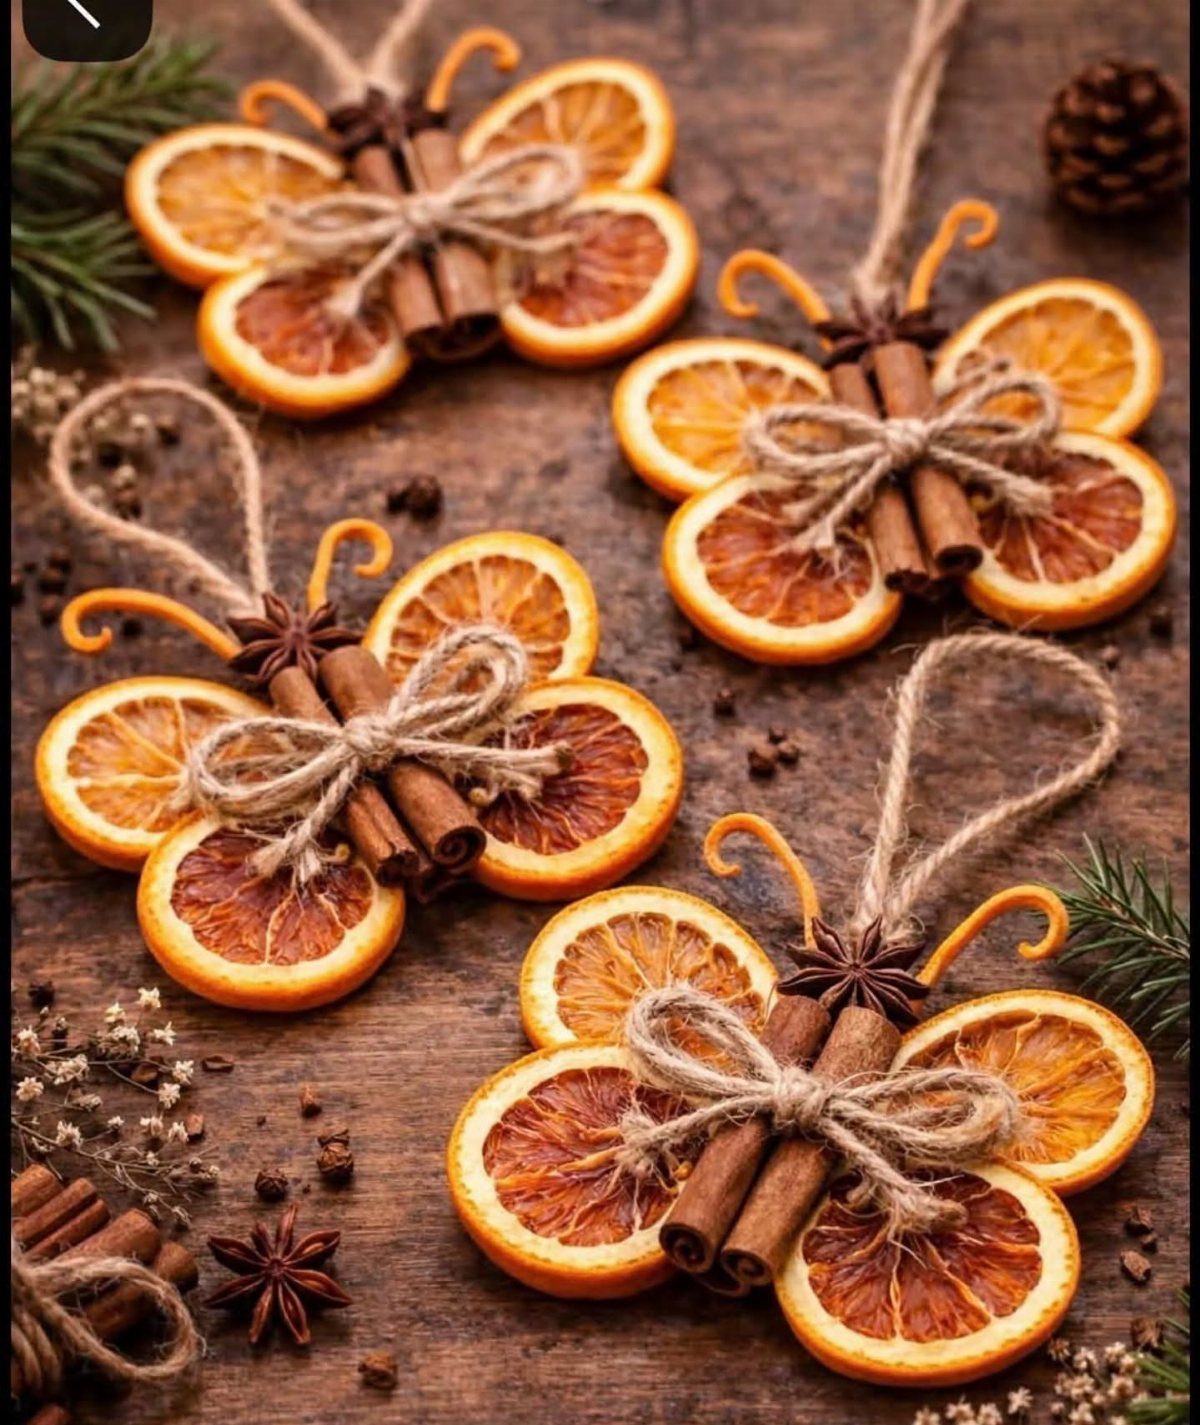
Dried orange slices are the one ornament here that makes the room smell like Christmas.
Slice the oranges evenly so they dry at the same pace, and let them dry completely before hanging, because damp slices can turn moldy. They cost very little and keep kids busy with the threading and tying.
6. Craft Stick Christmas Trees
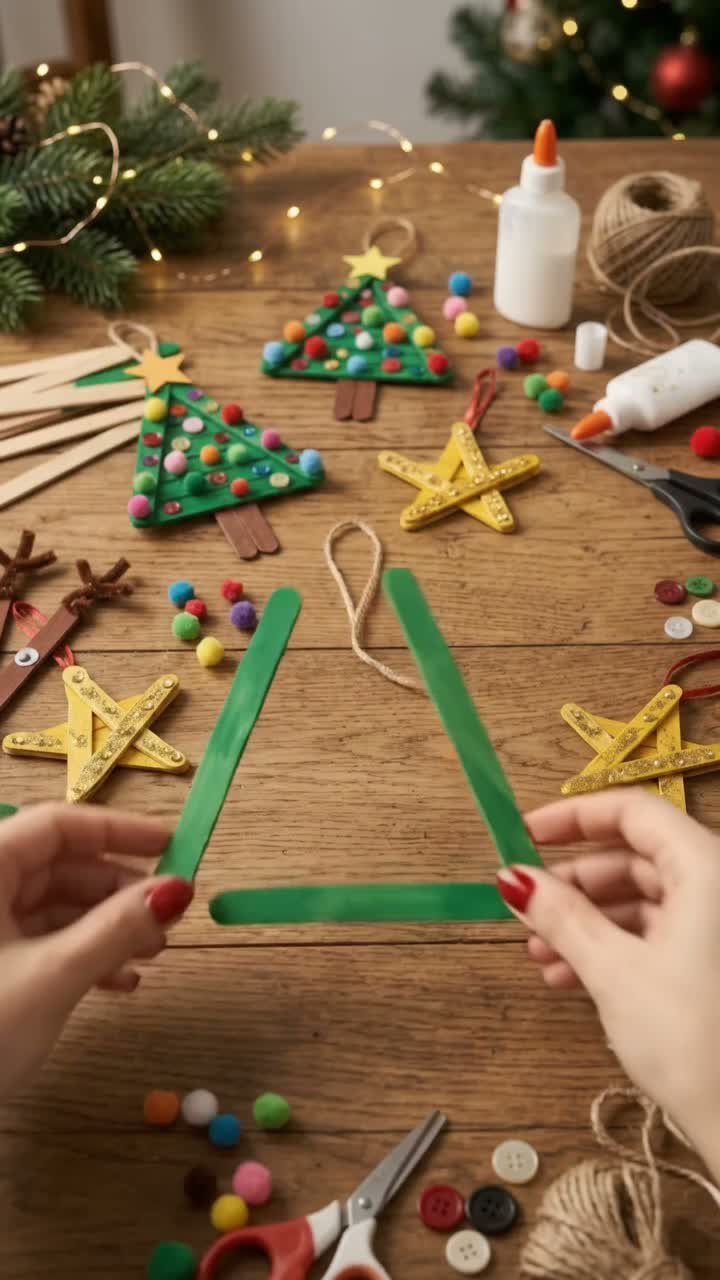
Craft sticks glued into a triangle make a tree in about the time it takes to find the glue. Green paint, a star on top, and pom-poms for decoration finish it.
Give the glue a few minutes to set before you handle the joints, or the sticks can slip.
I like this one for younger kids because the pieces are big, the supplies are cheap, and there is no wrong way to decorate it.
7. DIY Christmas Ornaments
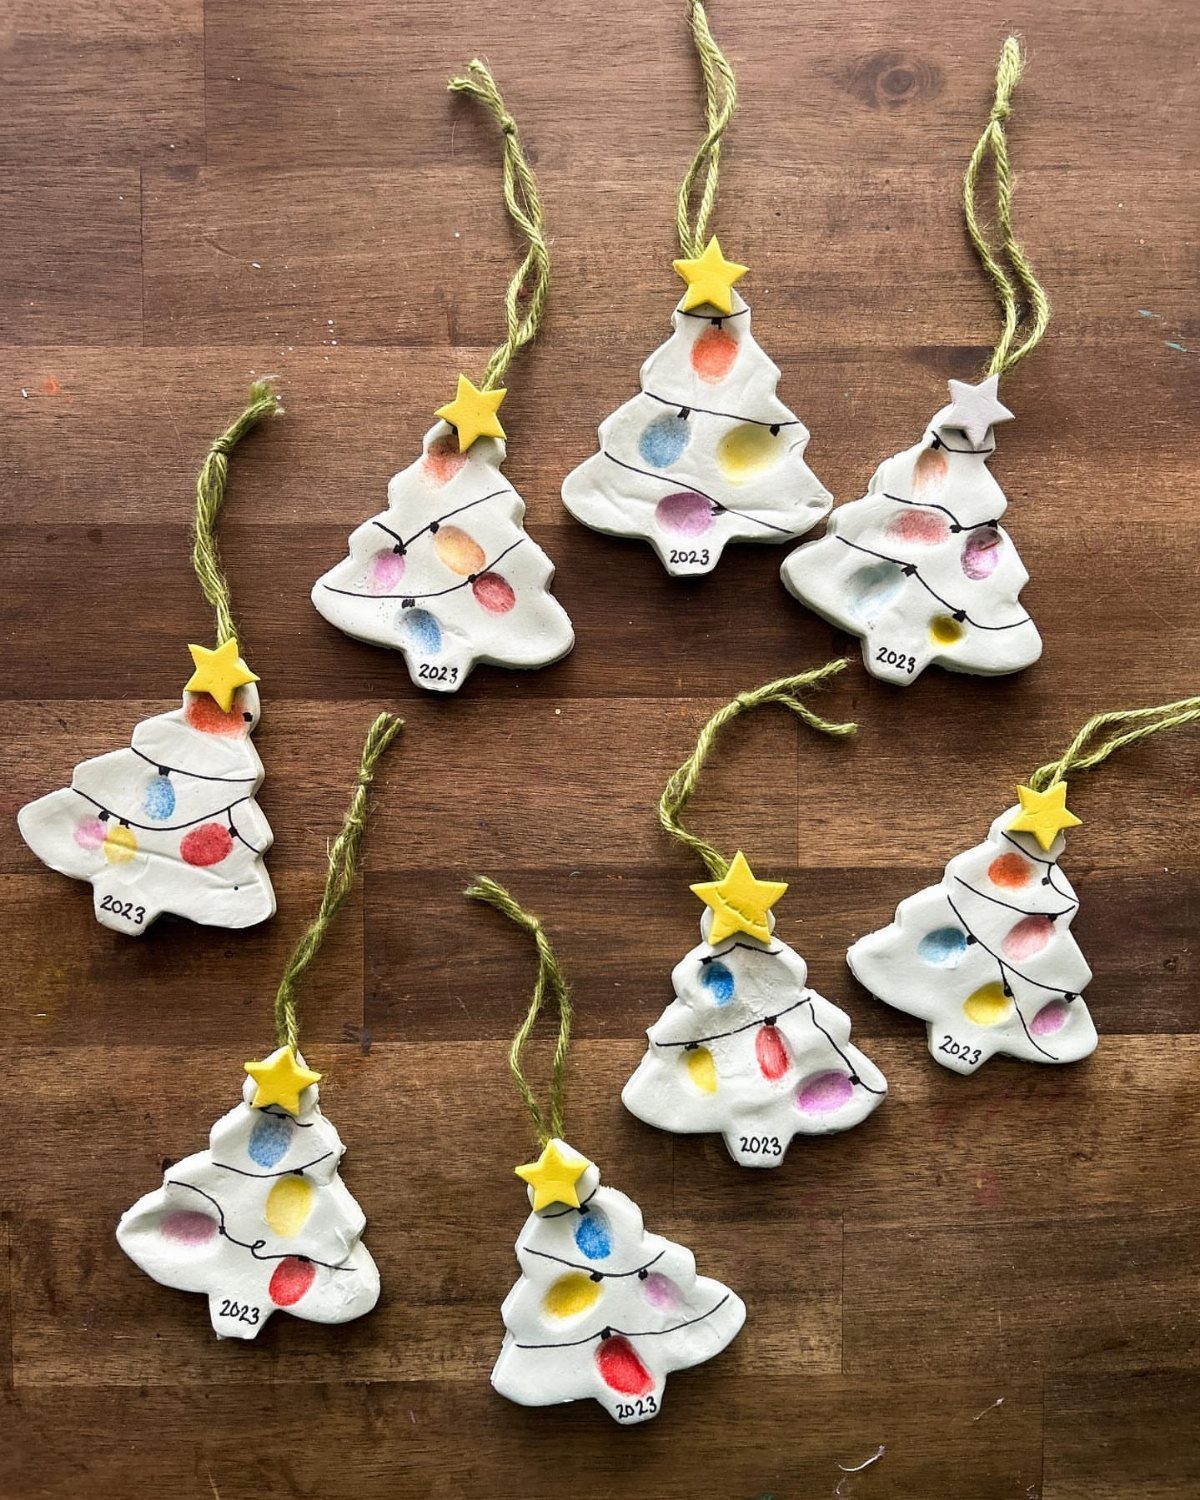
White clay stays plain until the paint goes on, so small dots of color for lights and a yellow star on top give tree shapes most of their charm.
Writing the year on the back of each one turns a batch into a dated set, and a fine-tip paint pen does it cleanly.
Paint the lights with a fine brush or a toothpick, and let each color dry before adding the next so nothing smears. Clay is cheap, and a dozen of these make a good group project for kids.
8. Peanut Shell Reindeer Ornament
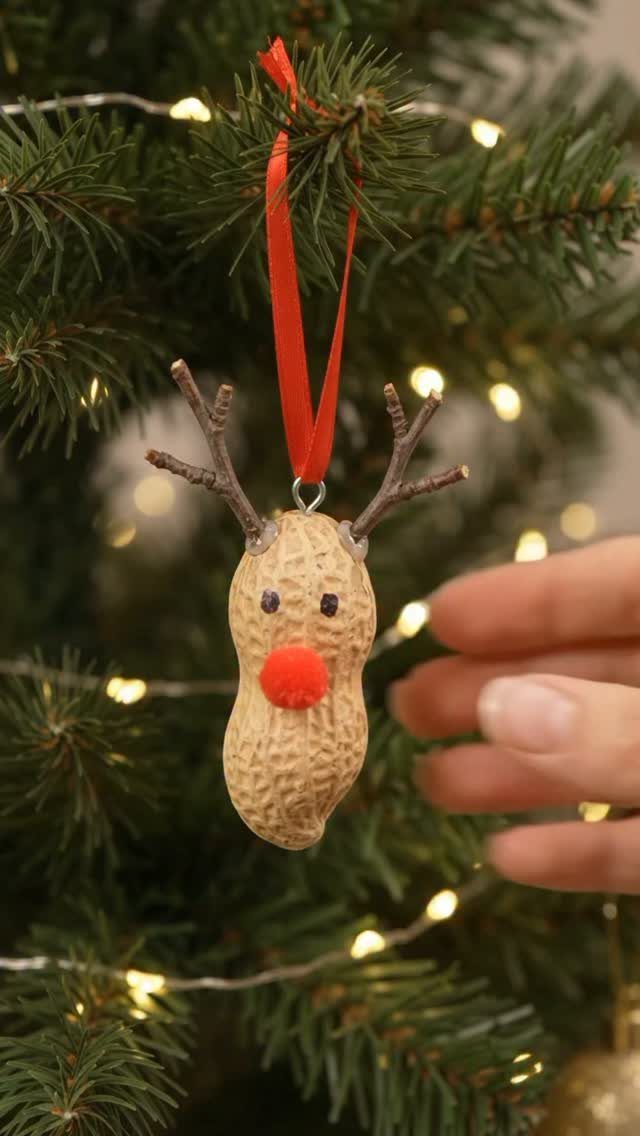
A peanut shell makes a convincing reindeer body, and a red pom-pom nose does most of the character work. Twigs gathered from the yard become antlers at no cost.
Glue the antlers on first and let them set before adding the nose, or the weight can tip them.
Pick small, forked twigs for the best antler shape. Kids enjoy this one because every shell comes out a little different.
9. Folded Book Page Ornaments
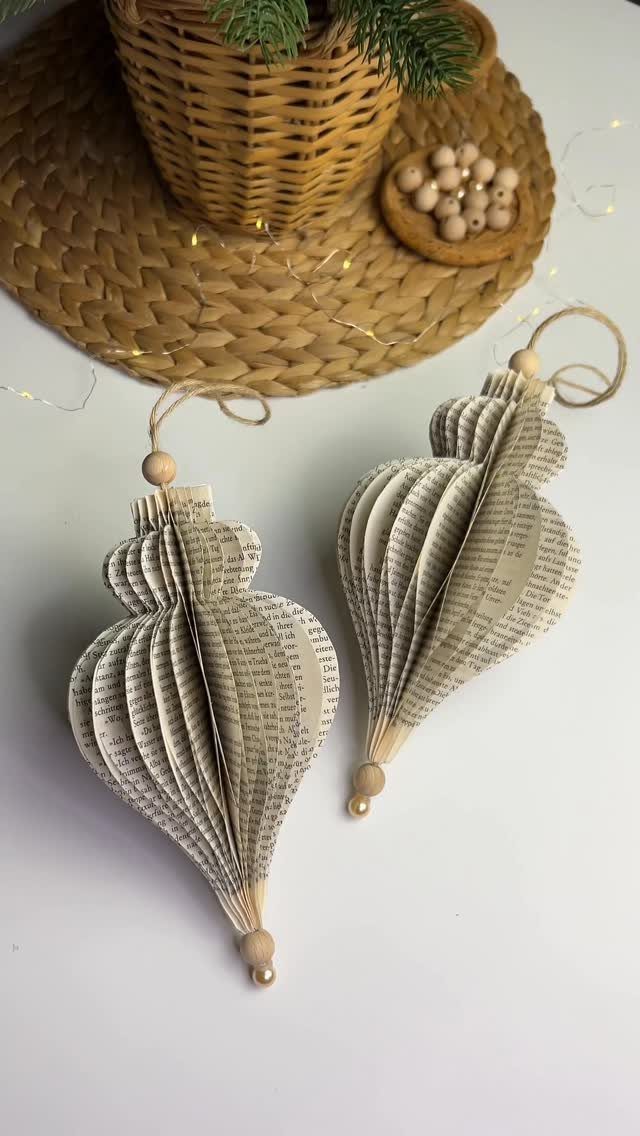
Folded vintage book pages turn into a teardrop shape that looks far more expensive than the paper it starts from. Wooden beads add a warm, natural accent.
Old paperbacks from a thrift shop are the cheapest source, and I would use a book you will never read.
Crease every fold firmly so the shape holds. The precise folding suits older kids and adults better than toddlers.
10. Rhinestone Brooch Ornament
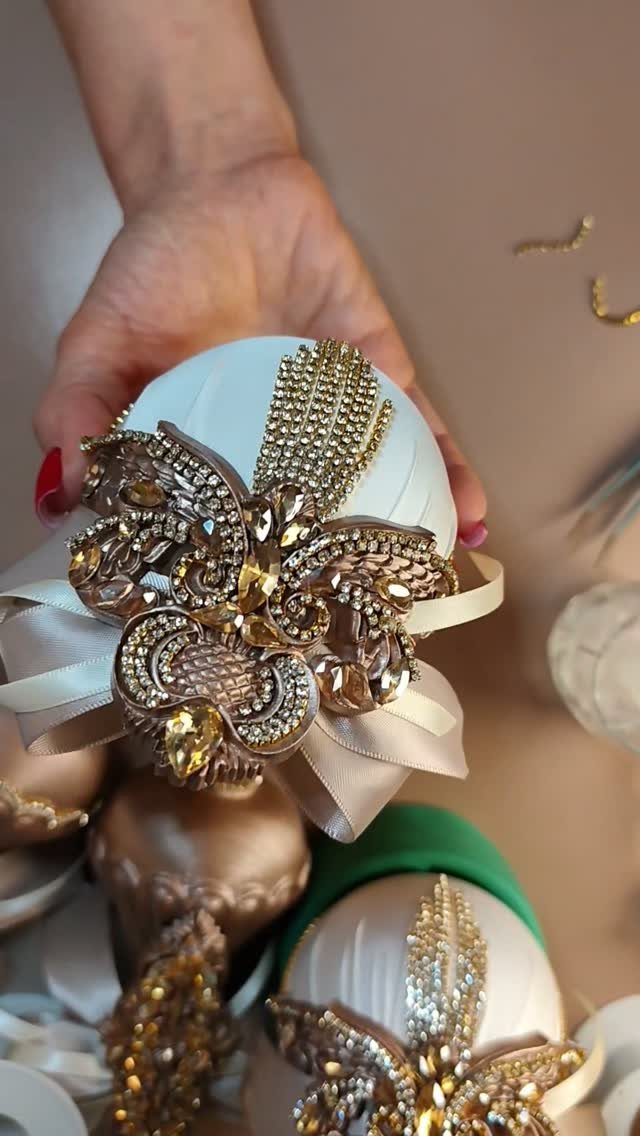
One large gold rhinestone brooch can give a plain white bauble the polish of a boutique piece. Satin ribbon around it finishes the look.
Check thrift stores and your own jewelry box for brooches, since one-off pieces make each ornament different.
Hot glue holds the brooch to the ball, and I would test a spot first on glass or plastic. This is an adult project; the glue is hot and the brooch pins are sharp.
11. Ceramic Angel Ornament
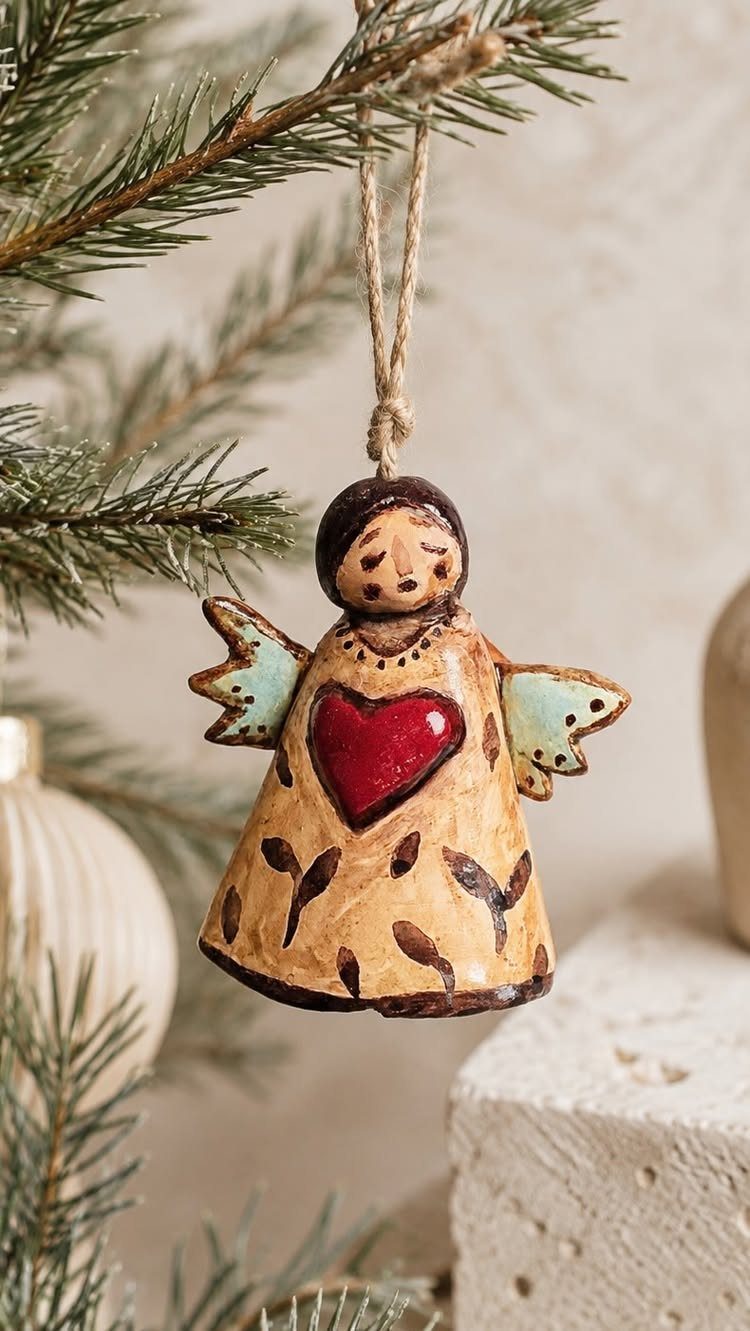
Blue wings and a red heart give this ceramic angel a folk-art look that suits a pine tree. Ceramic lasts, so it is a keepsake worth making carefully.
Air-dry clay is the easy route at home, while kiln-fired ceramic needs a pottery studio.
Paint the heart last so the red stays crisp against the wings. Like the handprint Santa, it helps to write the year on the back.
12. Mini Disco Ball Wreath
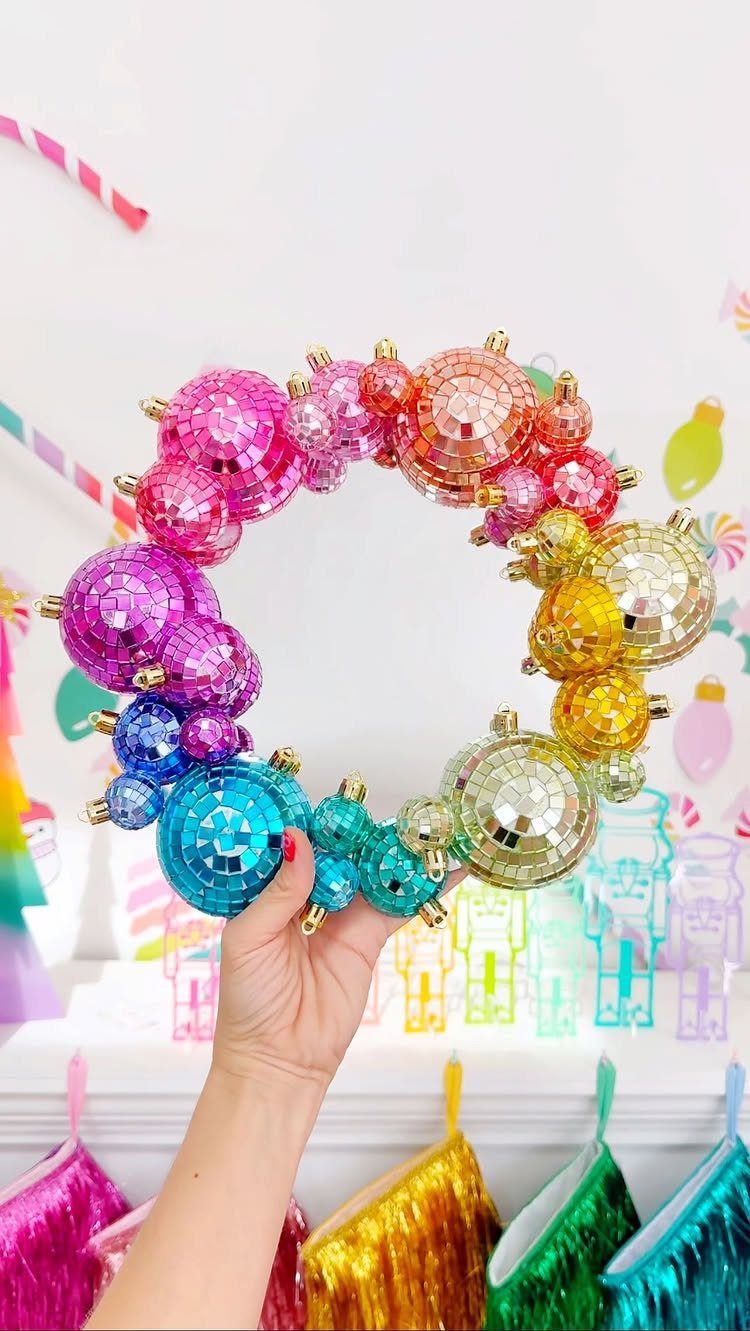
Small mirrored disco balls glued into a ring make a wreath that throws light around the room. Mixing colors keeps it playful rather than formal.
Buy the balls in a bulk pack to keep the cost down, and glue them onto a wreath base so they overlap with no gaps.
Hang it in a window or near tree lights, where the mirrors have something to reflect. Glue it yourself, and keep small hands away from loose balls.
Budget-Friendly Crafting
A basic kit covers a whole tree’s worth of ornaments for well under $20.
Clear glass or plastic balls run $1–2 per pack, acrylic paint $3–5 a bottle, brushes $2–4, and a roll of ribbon or twine $2–3. A glue gun and sticks add $5–8, and scissors with a craft knife $3–5.
Paper, fabric scraps, and buttons from around the house cost nothing, so use them before buying decorations.
If you want to skip the craft store entirely, kitchen twine works as both hanger and trim. Rickrack, mini ornaments, and holly berries from last year’s garland can dress up a plain painted shape.
Buy the paint and glue once and plan several projects around them. A single bottle of green stretches across many ornaments.
Family Crafting Tips
Match the job to the age. Preschoolers and early elementary kids, roughly ages 3–6, are happiest with a paintbrush, a sheet of stickers, or a length of ribbon to knot through a hanger.
Give teens and adults the fiddly steps, like fine brushwork and tight gluing, and let them run the table while the younger ones work.
Hot glue stays with an adult, and I would hand younger kids child-safe scissors only. Open a window or run a fan when paints or adhesives are out.
Set up before anyone sits down. Lay newspaper or a plastic cover over the table, and put each station’s supplies within reach so no one wanders off to look for the glitter.
Using Natural Materials
Pinecones are the easiest free material. Paint the tips white or green, add small beads as ornaments, and tie on ribbon to hang them as miniature trees.
Small twigs can be arranged into a star and held with hot glue, then wrapped in fairy lights or ribbon.
A 4-inch grapevine ring becomes a mini wreath once you wind twine around it and tie a loop at the top for hanging. Glue on foraged pine, cypress, or fir, then add a few whole star anise.
Pour melted wax into a large acorn cap, set a short wick in the middle, and you have a tiny candle for the mantel.
I would keep those off the tree and display them on a tray, away from anything flammable, and never leave them lit unattended.
Gather materials on a dry day, and shake out any bugs before you bring them inside.
Frequently Asked Questions
What’s the easiest DIY ornament for beginners?
Paper snowflakes and painted glass balls are the simplest places to start.
Both need few supplies and basic technique, and the results look good right away. If you want something even more forgiving, glittered clear ornaments are quick, since the glitter stays sealed inside the ball.
How far in advance should I start making DIY ornaments?
Start 4–6 weeks before Christmas. That leaves time for clay or paint to dry, for extra coats, and for working without a rush.
Buying supplies a little at a time also keeps the cost manageable, since a few small shopping trips hurt less than one big haul in early December.