Which of these paper decorations to make depends on where it will go: wreaths, holly and garland suit a door, wall or mantel, baubles, stars and pleated fans hang on a tree, and paper trees, mini houses and the gingerbread house stand on a table.
The list runs from a snowflake cut from a single sheet of paper to a cardboard gingerbread house, with plenty of stars, lanterns, garlands and angels in between.
Most of it needs only scissors, a glue stick, and leftover wrapping paper or old cards, and the 24 numbered flaps on the tree advent calendar are the most patient project here.
1. Paper Snowflakes
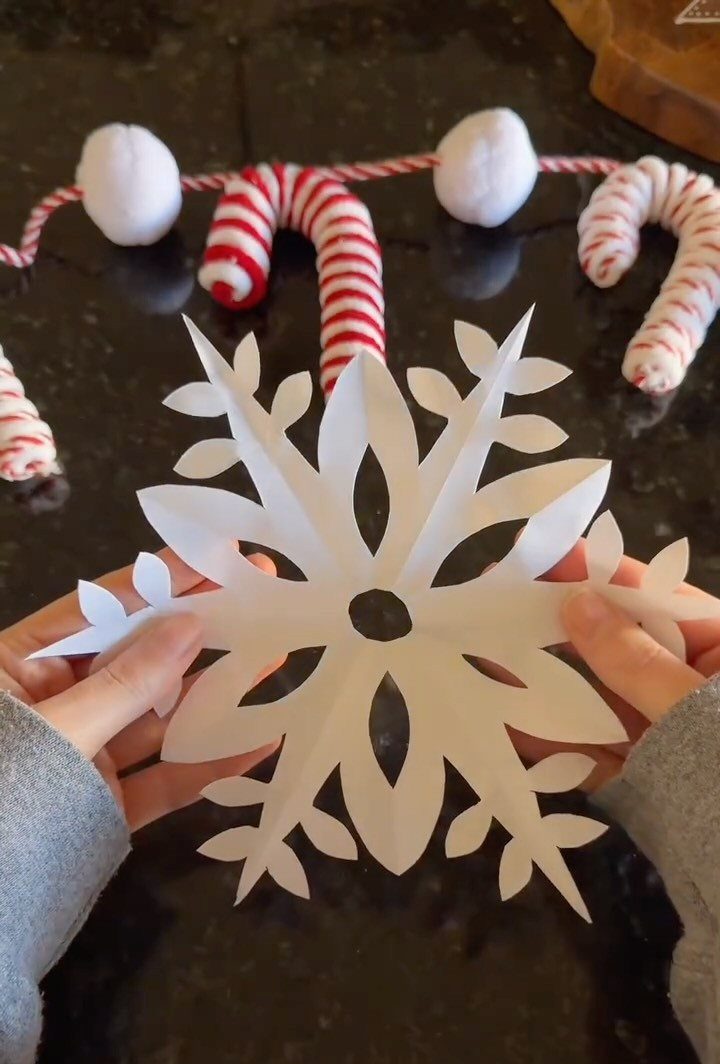
A snowflake is the cheapest decoration you can make: one sheet of white paper, a pair of scissors and a little patience. Each one comes out different, which is the appeal.
Fold the sheet several times before cutting, and keep the cuts small and varied. Fine, lacy snowflakes like this one look best against something dark, so hang them on a window or a deep-colored wall.
Making a handful with kids is an easy afternoon.
2. 3D Paper Stars
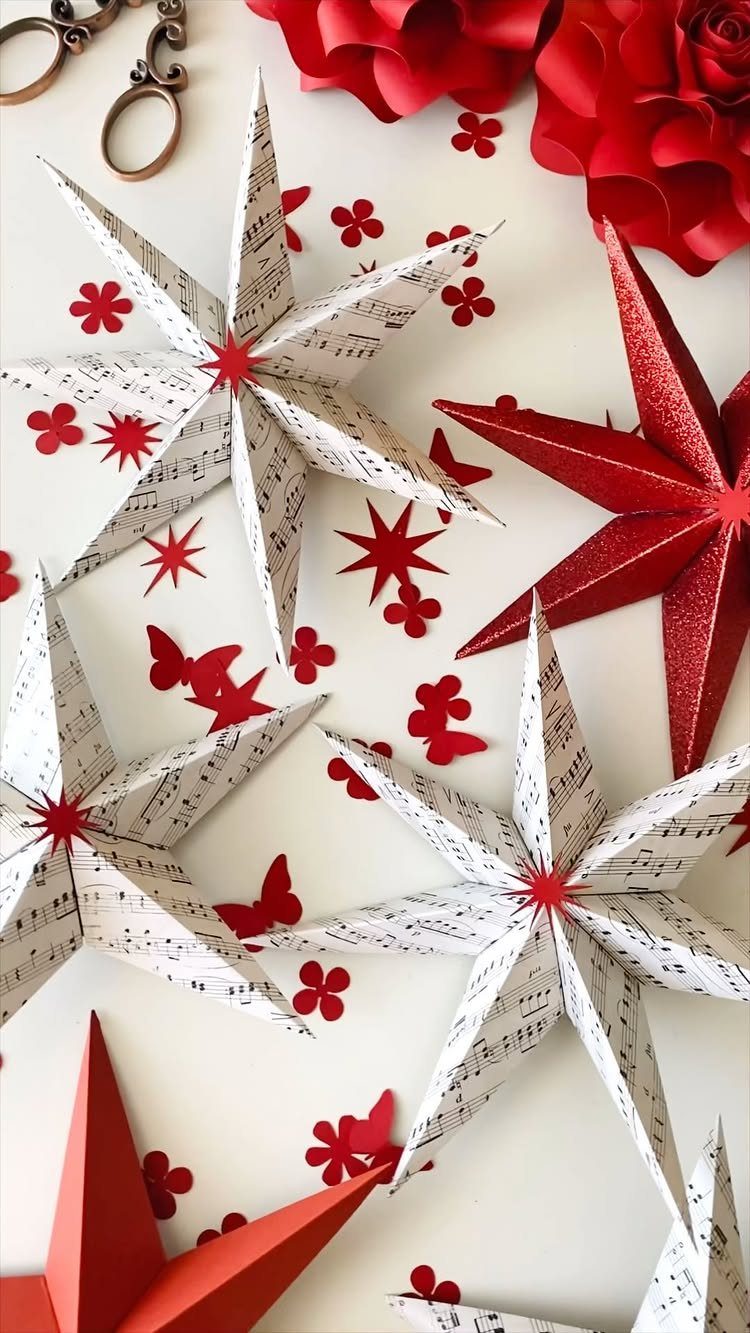
Sheet music is my pick for these stars, because the printed staves give a plain fold some character. Red glitter paper works as a bolder partner, and mixing the 2 gives you a set that looks planned.
Folded stars read well on a mantel, a tree or a table, since the points catch light from every side. Cut all the pieces from one template so the points line up when you join them.
Glitter paper is stiffer than printed paper and holds a crisp edge, though it is harder to fold cleanly.
3. Mini Paper Houses
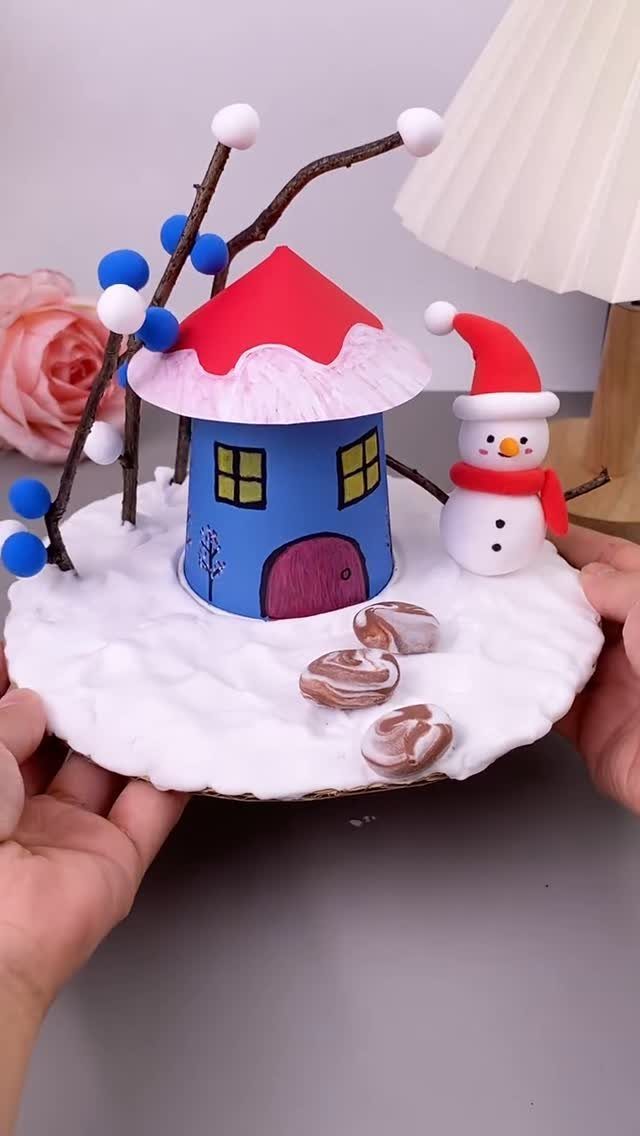
Small houses suit a tabletop better than a wall. Cut the house from colored paper, add a contrasting roof, and set it on a white base so it looks like it is sitting in snow.
A twig makes a decent tree, and a tiny snowman fills out the scene.
The maker of this one wrote that the house is covered in snow, and that is the detail worth copying: a dusting of white across the roof and base ties everything together.
Cut a small cluster in assorted colors and group them on a mantel or shelf.
4. Paper Lanterns

Lanterns only work if the light inside is safe for paper. Battery-powered LED lights are the sensible choice; a real flame does not belong in a paper shell.
Hang several in graduated sizes rather than a single large one; the mix looks fuller and more deliberate.
Varying the sizes gives the cluster depth, and white paper lets the light spread evenly. Stagger the drop lengths so no lantern hides another.
A dark ceiling or a dim room shows the glow best, so switch off the overhead lights when guests arrive.
5. Paper Wreaths
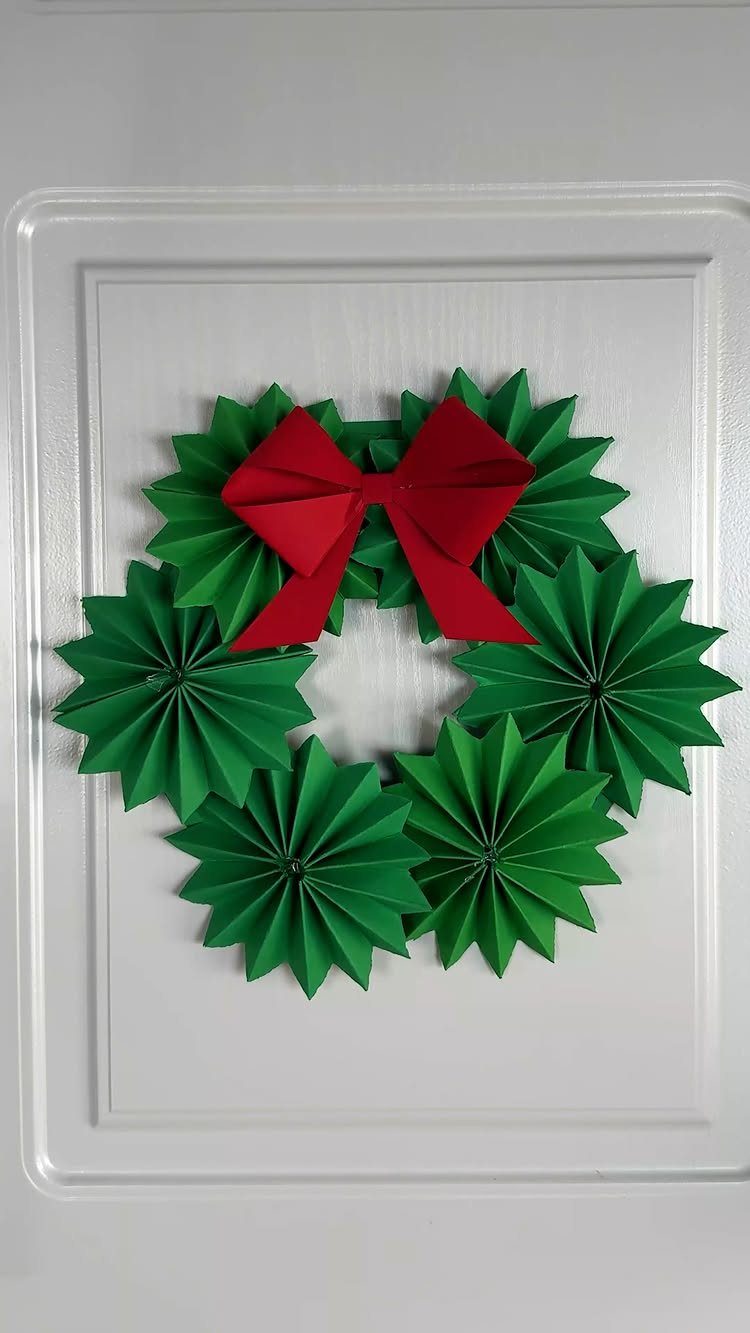
Folded paper fans, each shaped into a star, make a wreath that is lighter than anything you could buy. Green paper reads as evergreen, and a red bow covers the spot where the ends meet.
Make more fans than you think you need. Crowding them around a ring base hides any gaps and gives the wreath a full shape.
Because paper weighs almost nothing, a small adhesive hook is probably enough for a door like this one. Test it before you trust it overnight.
6. Paper Christmas Garland
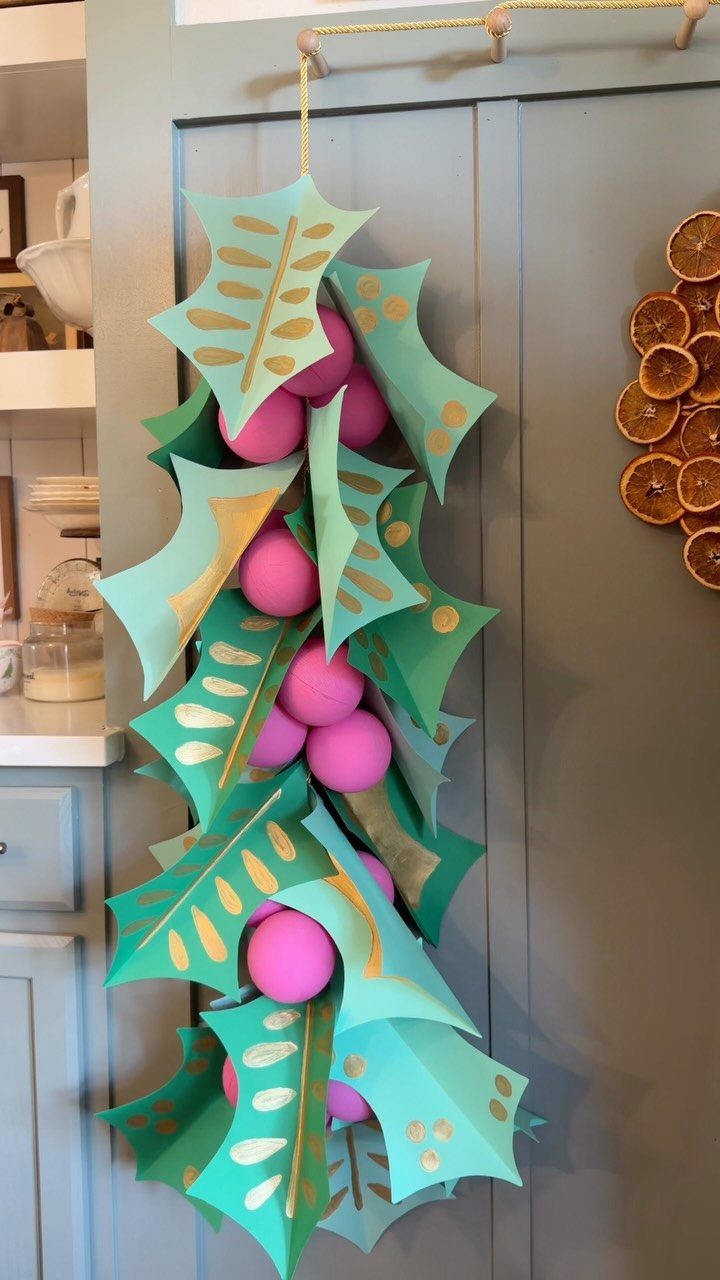
Teal holly leaves paired with pink paper spheres is a color choice I would happily steal. It steps away from red and green and still looks like Christmas, especially next to dried orange slices.
Hanging the garland vertically makes it ideal for a door or a narrow wall, where a swag would not fit. Cut the leaves in bulk, then thread them onto a string with a sphere between every few.
Paper is forgiving here: if the string looks bare, add more leaves.
7. Honeycomb Ornaments
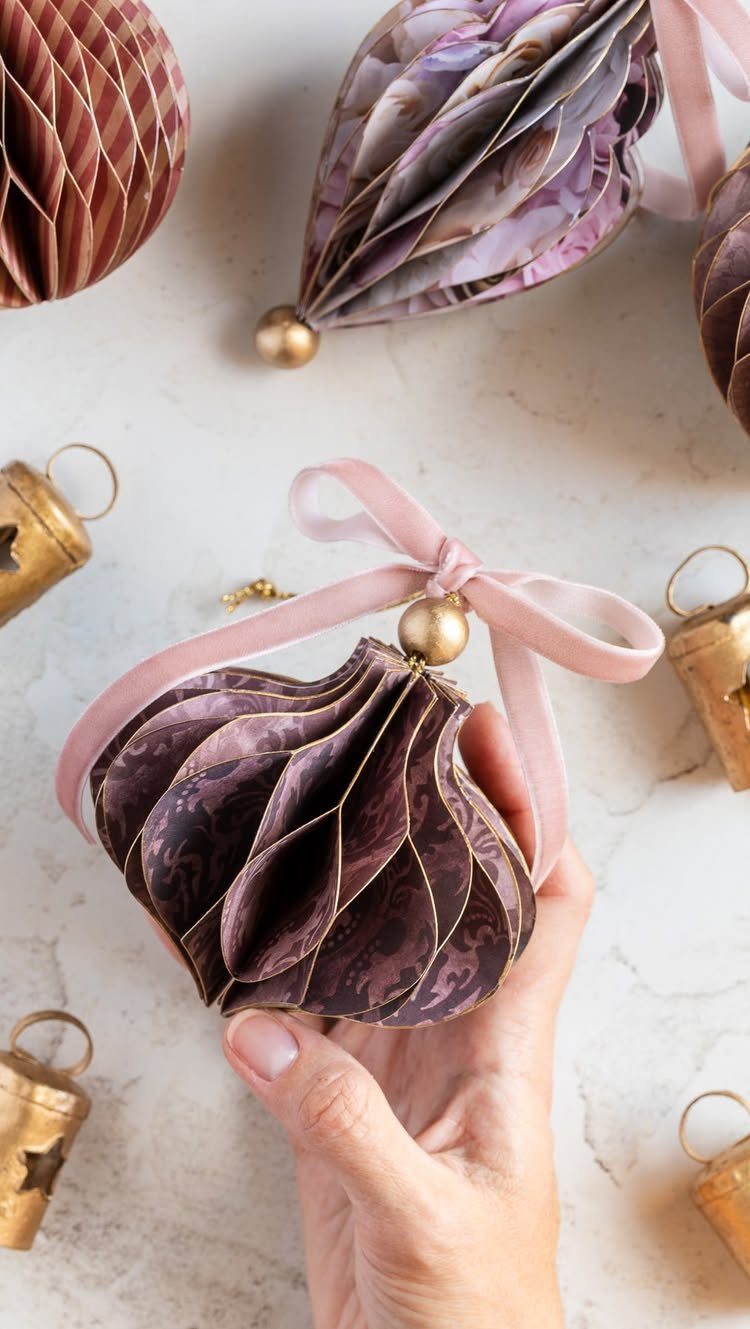
Honeycomb paper is sold flat and opens into a round, textured ball, which is why these ornaments look far more complicated than they are. Patterned paper in 2 colors gives honeycomb folds more interest than solid sheets.
The maker of this set designed 5 different honeycomb ornaments, so one pattern can stretch into a varied collection. Pick two or three colors and let the prints do the work.
Add a ribbon loop for hanging, and a few small gold bells make a nice finishing touch.
8. Paper Baubles
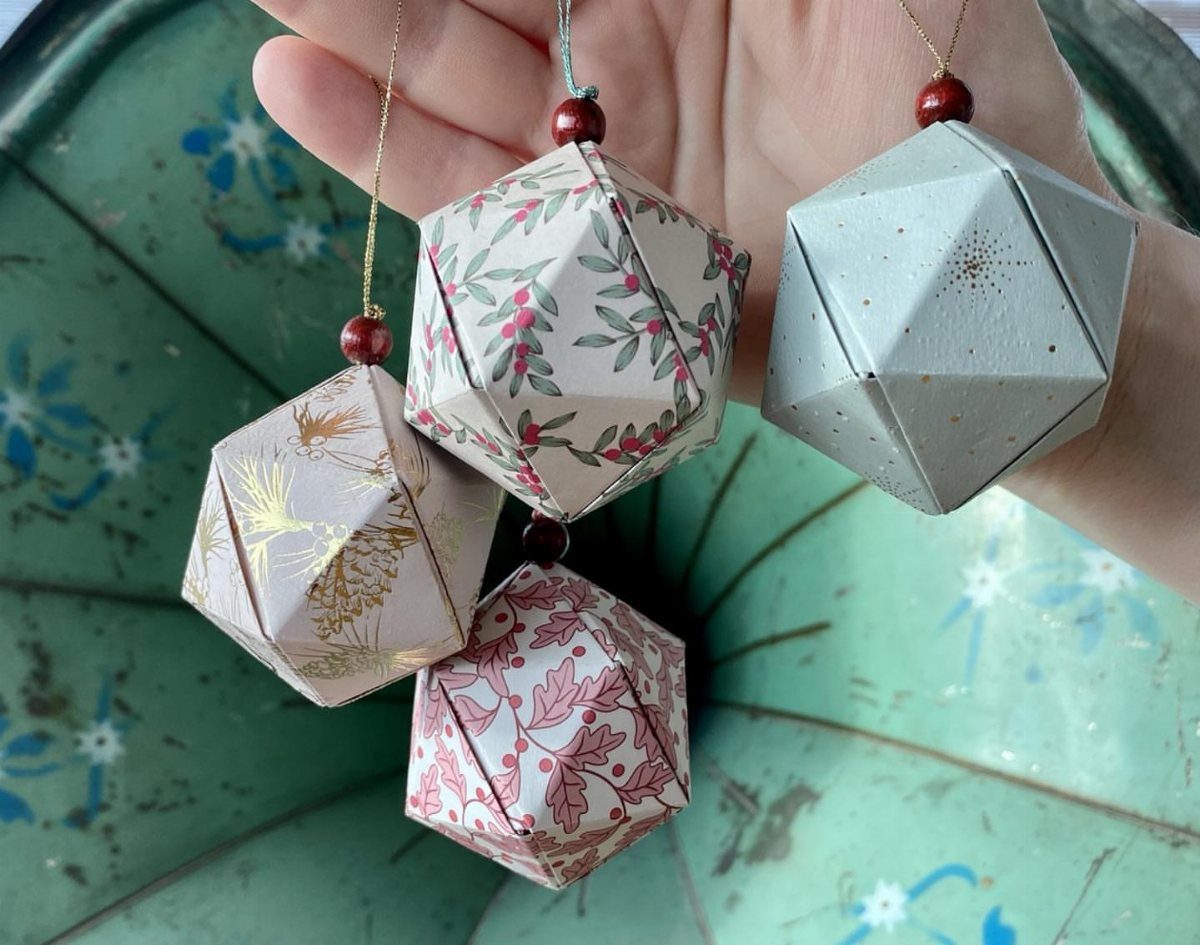
Baubles are the easiest way to put paper on an actual tree. Geometric shapes hold up well because the facets break a pattern into small panels, so floral and gold prints each get their own moment.
Mix patterns, but keep one shared color across the set so it reads as a collection. A plain, deeper backdrop, like the teal here, makes lighter baubles stand out.
9. Book Page Ornaments
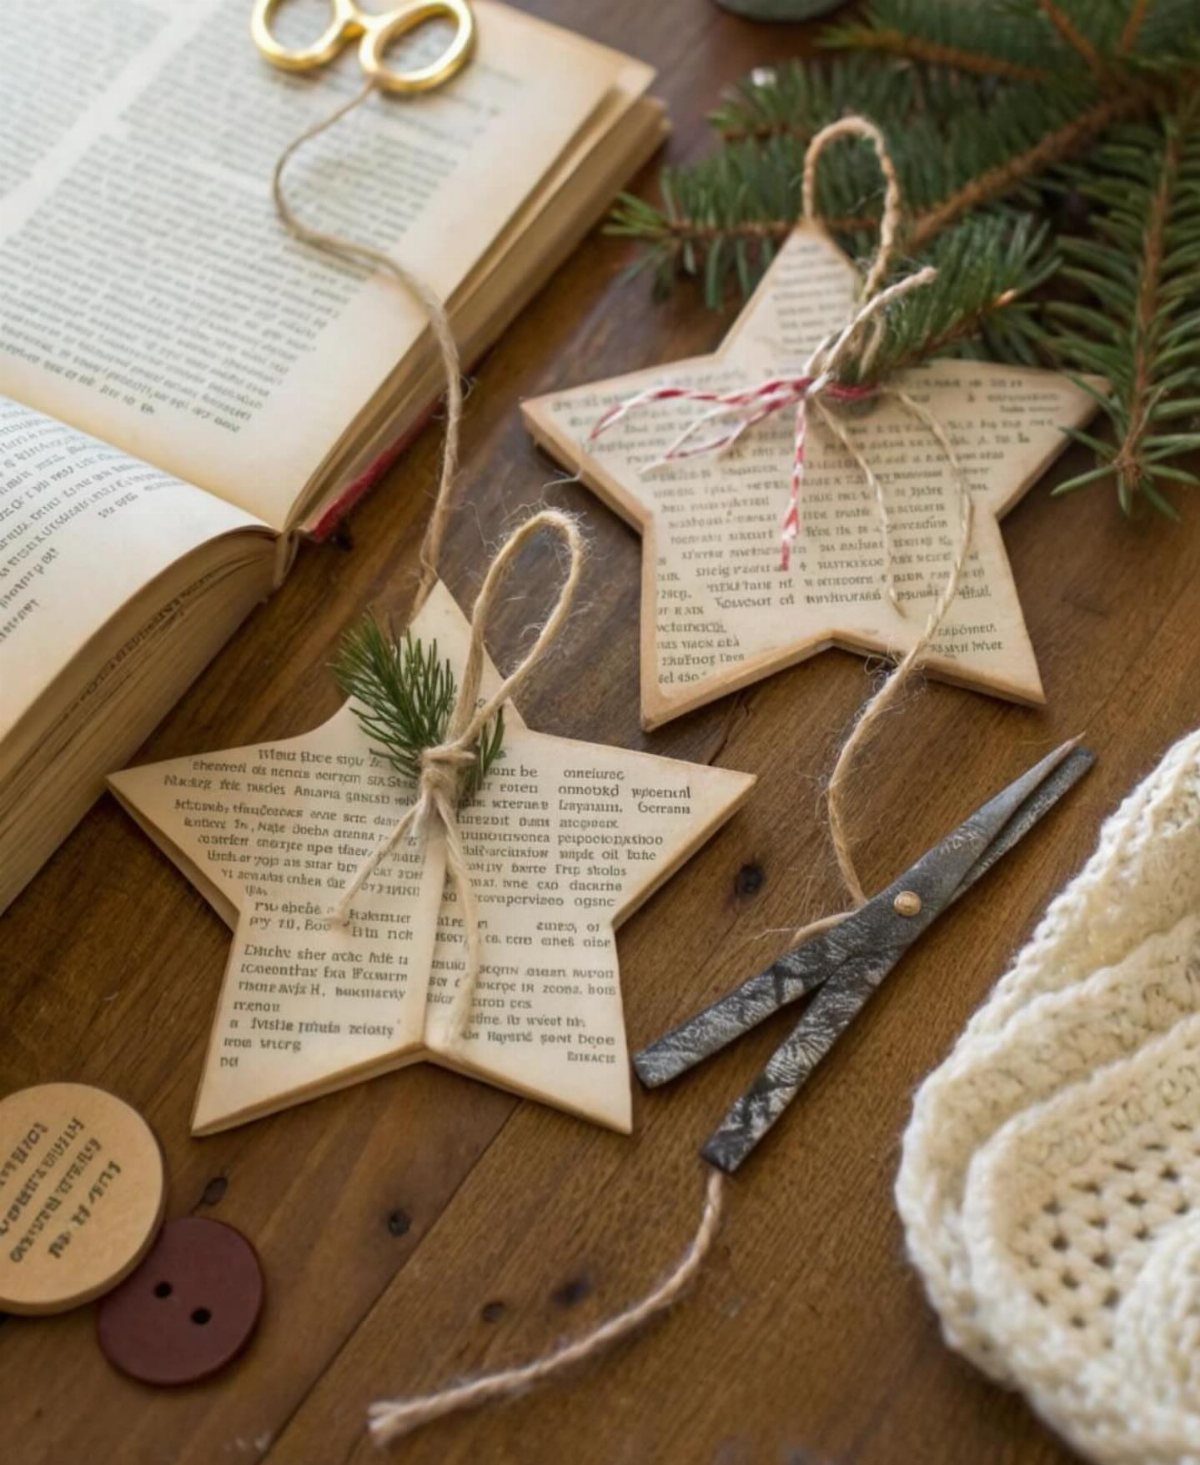
Old book pages make a star that needs almost no shopping: a page, scissors and a length of twine for the loop.
A damaged paperback is the best source, since the printed text gives the paper color and character without any paint.
Choose a book you will not read again. Cutting up a good one is a poor trade.
Evergreen branches are a natural partner, so tuck a few stars among them on a mantel or table.
10. Christmas Cards
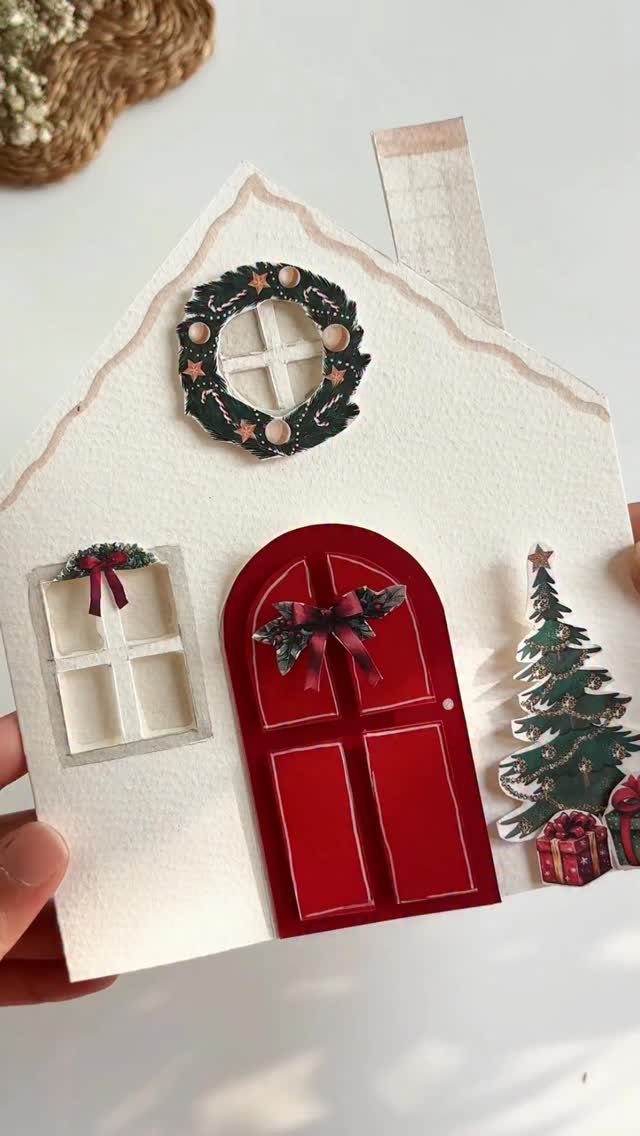
A house shape says more than a flat rectangle, and white paper keeps the focus on the red door and wreath detail. Small details such as a window and a miniature tree turn a simple shape into a scene.
Handmade cards take longer than store-bought ones, so make a few for the people who matter most and buy the rest.
11. Cut-Out Paper Hearts
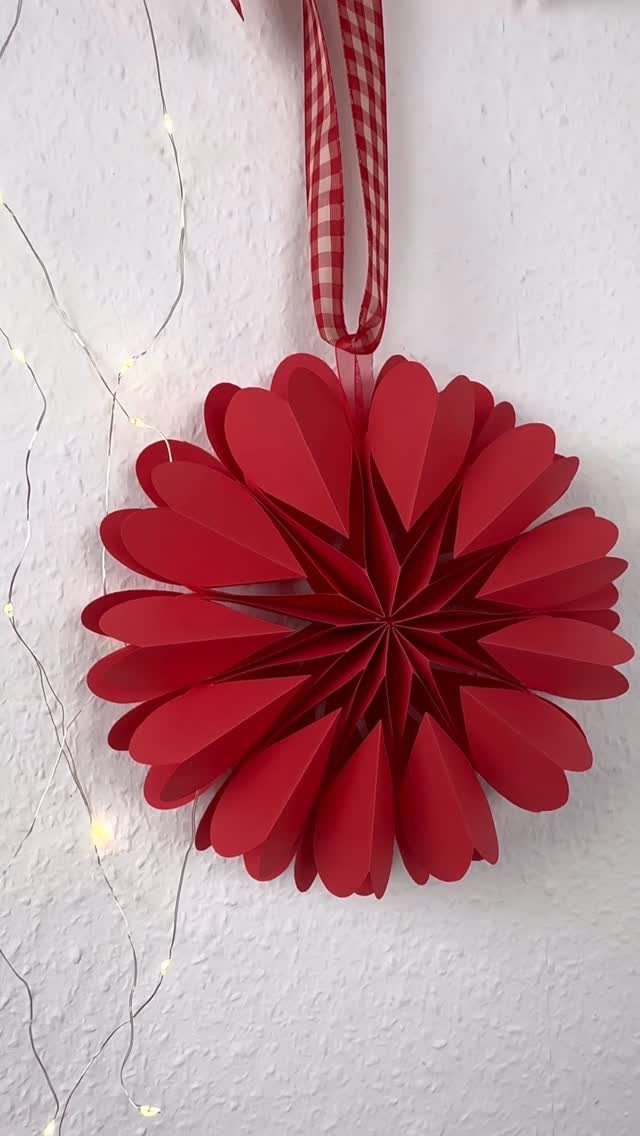
Hearts cut from red paper and joined into one ornament give you a decoration with a second life. Hung from a checkered ribbon, it suits Christmas, and it can come back out for Valentine’s Day.
Store the ornament flat in a box so it keeps its shape for next year.
12. Paper Gift Bows
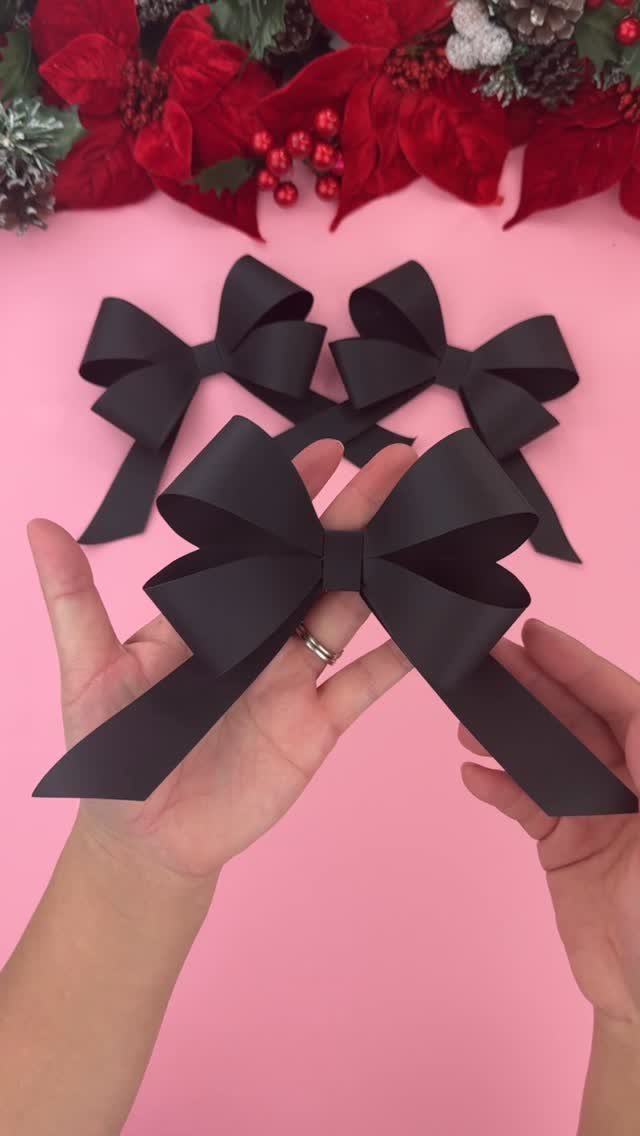
Black paper against pink or red wrapping makes a bow look modern instead of traditional. Paper bows cost far less than ribbon, and you can make a whole batch from one sheet.
Make bows in matching sets so the gifts under your tree look coordinated. Stick one on a package or hang several on a door for a quick holiday accent.
A bow also hides a messy wrapping fold, which I count as a bonus.
13. Paper Chains

Paper chains are the oldest trick in the box, and a red and pink pairing keeps them from looking like a school project. Alternate the 2 colors link by link so the pattern repeats evenly.
Cut every strip the same width and length, then loop each one through the last and glue it closed. Scrap paper and leftover wrapping both work, so the whole chain can go in the recycling bin in January.
Drape it along a white wall or curtain, where the colors read clearly.
14. Paper Angels
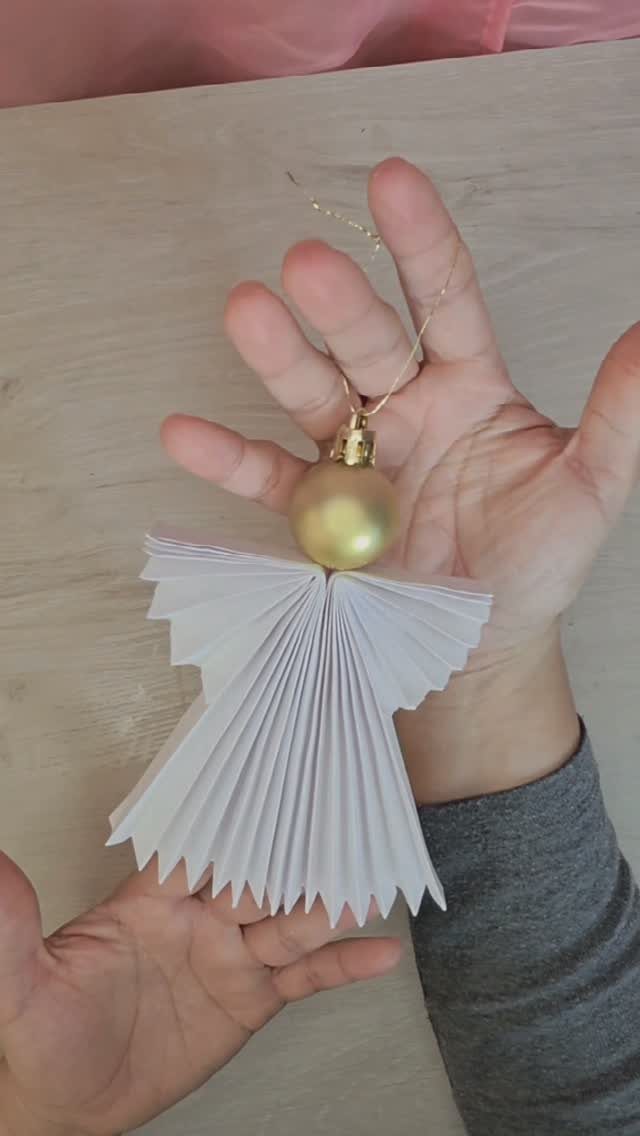
White pleated paper for the body and a gold bauble for the head make an angel that looks finished with almost no work.
A pleated body spreads into a skirt, so the shape reads as an angel from across the room.
Fold an accordion, pinch it at the top, and glue the bauble above the pinch. Pleats hold their shape better when the paper has some weight, so skip tissue.
Set one at the top of a small tree, or hang a few as ornaments.
15. Paper Loop Characters
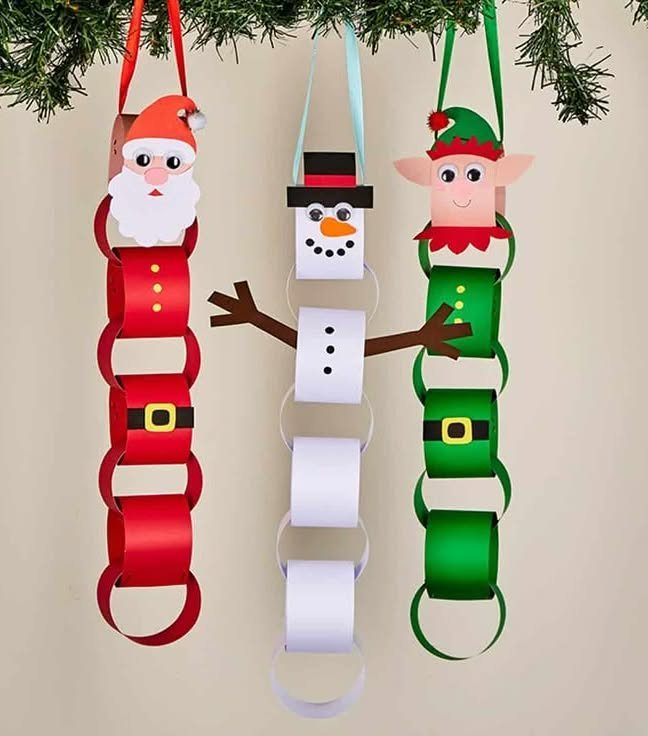
Santa, a snowman and an elf all come from the same basic move: curl strips of colored paper into loops and glue them into a body. Swap the colors and the same loops give you a different character.
Keep every loop the same size so the bodies stay tidy. Add the faces last, in small details, because they decide who is who.
A pine branch makes a good hanger, as it does here. Kids can make a whole trio in an afternoon.
16. Paper Tree Advent Calendar
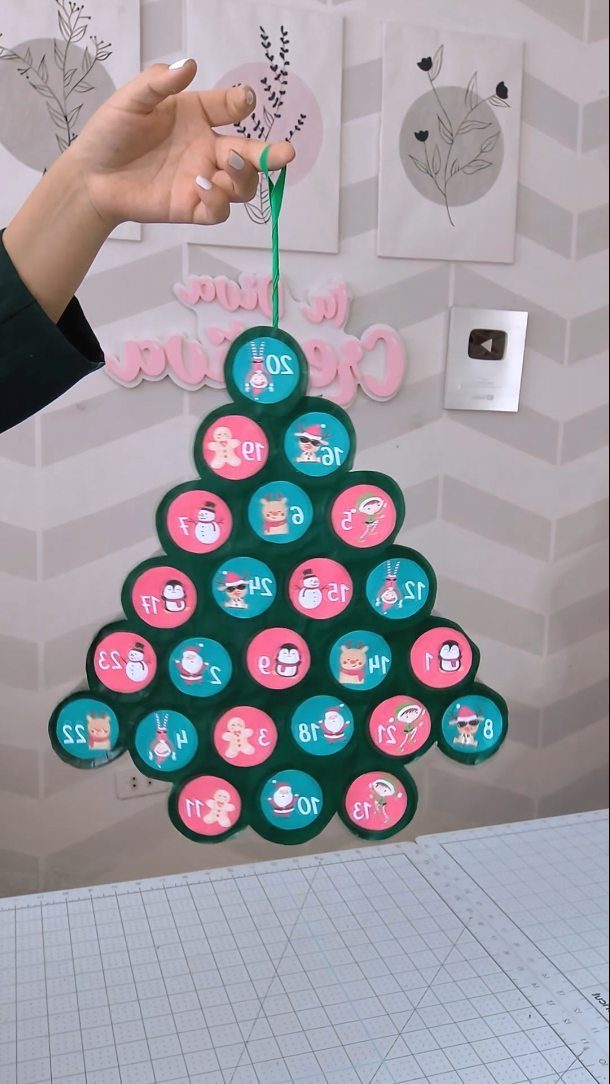
A tree-shaped advent calendar with numbered circular flaps takes up far less room than a box set, and it hangs flat on a wall.
Each flap hides a small space, so you can tuck a treat or a note behind it.
Cut the tree from green paper, number the circles from 1 to 24, and glue them on as flaps that lift. I would draw a small holiday icon on each one so the countdown has some personality.
Keep the paper sturdy enough to handle daily opening.
17. Pleated Paper Fan Ornaments
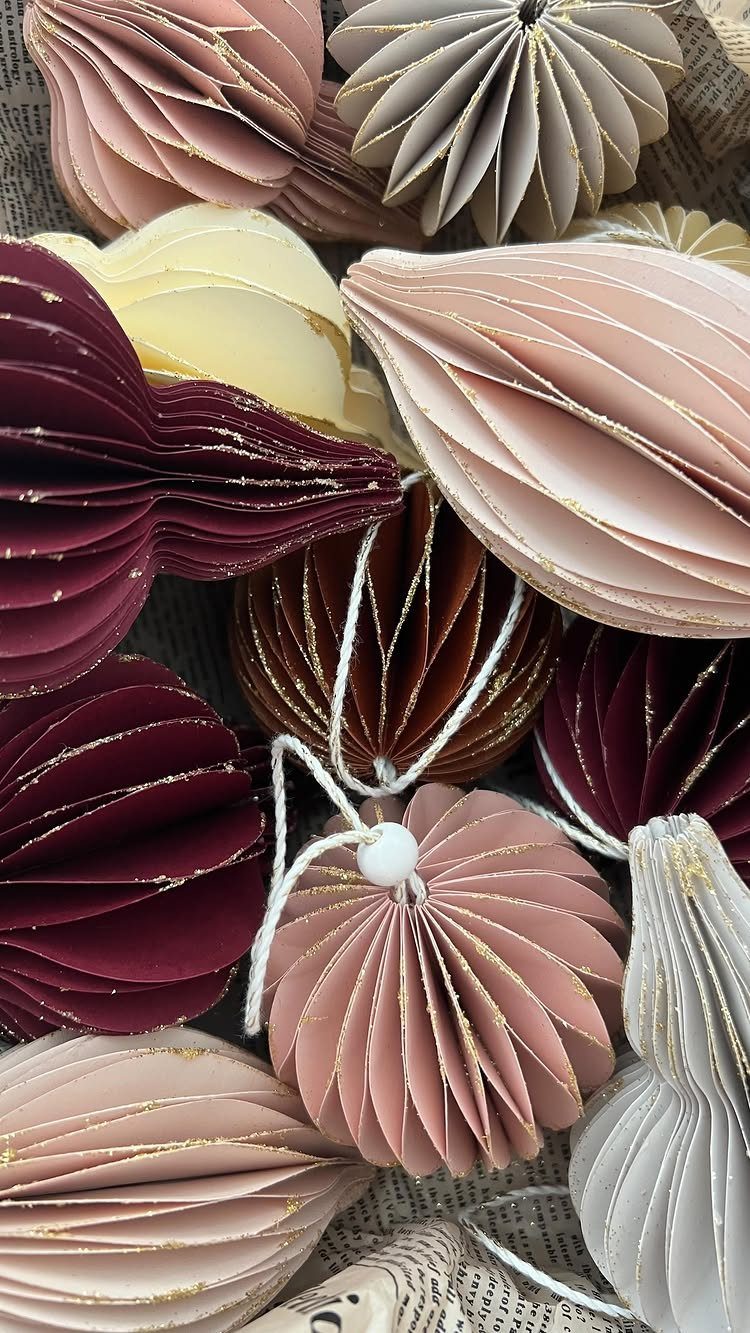
Burgundy, gold and silver fans with glittery edges look like something from a shop, yet each is a strip of paper folded back and forth.
Fold it accordion-style, then join the ends into a circle so it opens like a round fan.
Paint or brush glitter along the pleated edge for the sparkle. Pick a few colors and hang the fans in a mix so no 2 neighbors match.
Glitter sheds, so seal it with a thin layer of glue and work over newspaper, as this one rests on.
18. Paper Holly Wall Decor
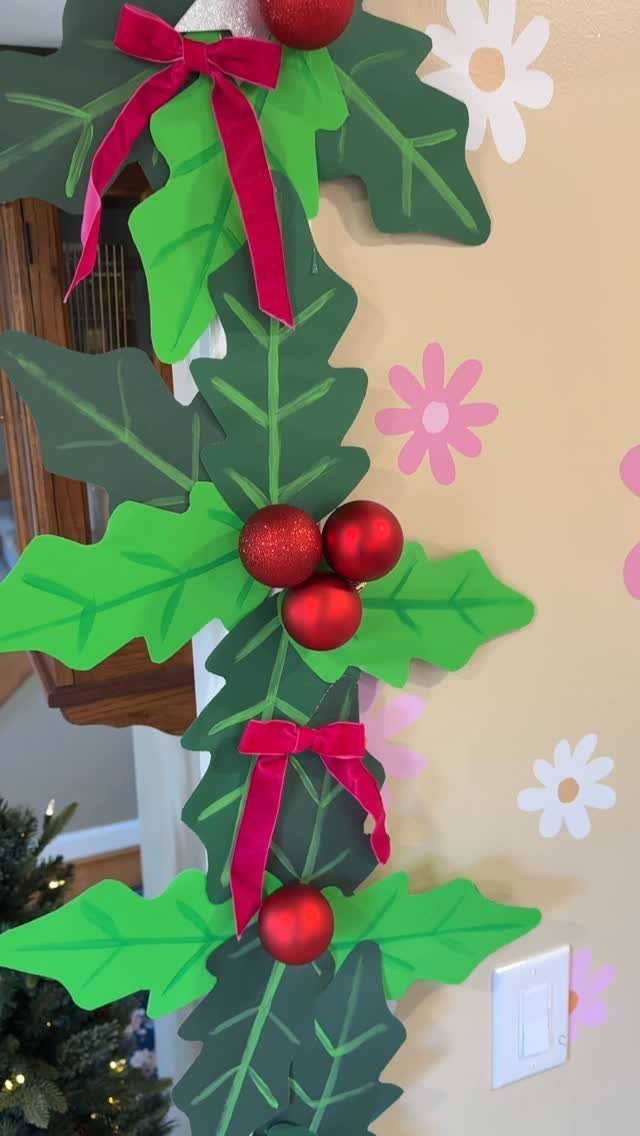
Paper suits holly because the plant is just glossy leaves and a few round red berries, and both are easy to cut and punch. Cut green leaves with pointed edges, then cluster them with red ornaments standing in for berries.
Pink ribbons add a softer note than the usual red, and they cover where the leaves overlap. Build the cluster on the table first, then fix it to the wall.
A plain beige wall makes the green and red stand out. Use removable adhesive so the paint survives the holidays.
19. Paper Christmas Trees
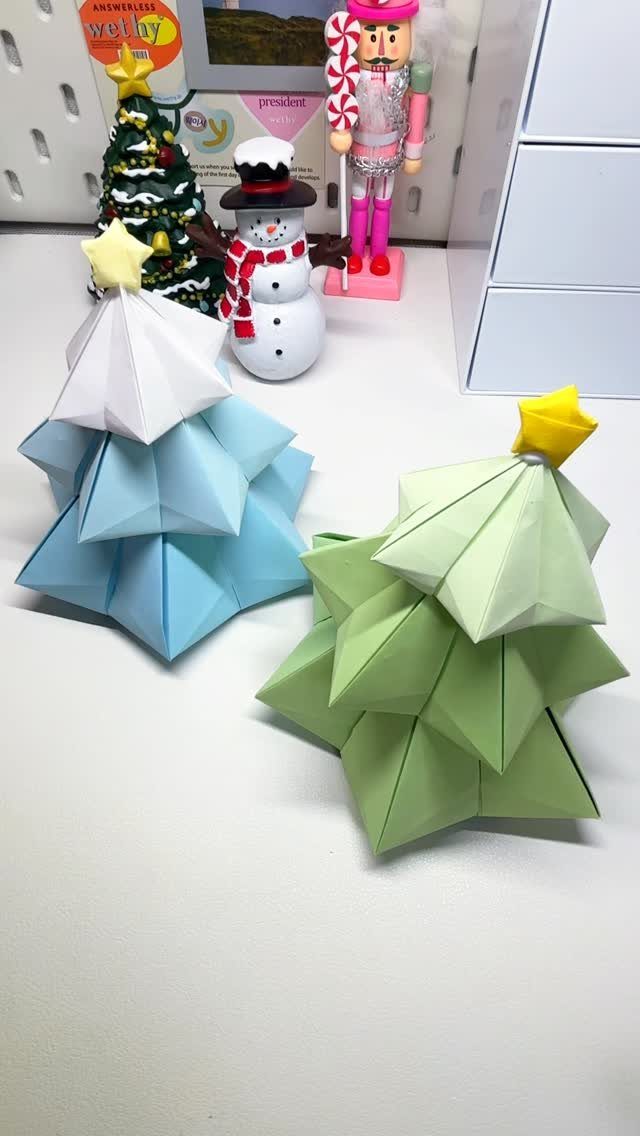
Origami trees fold from a single square of paper, so there is no glue to fuss with and no scissors to hunt down.
Blue and green both work, and a small yellow star on top gives each tree its finishing point.
Make them in a few sizes and stand them in a row on a shelf or table. Set a pair beside a small snowman or a miniature tree and you have a winter scene in minutes.
Fold a practice tree from scrap paper first, so the creases are crisp when you use the good sheet.
20. Cardboard Gingerbread House
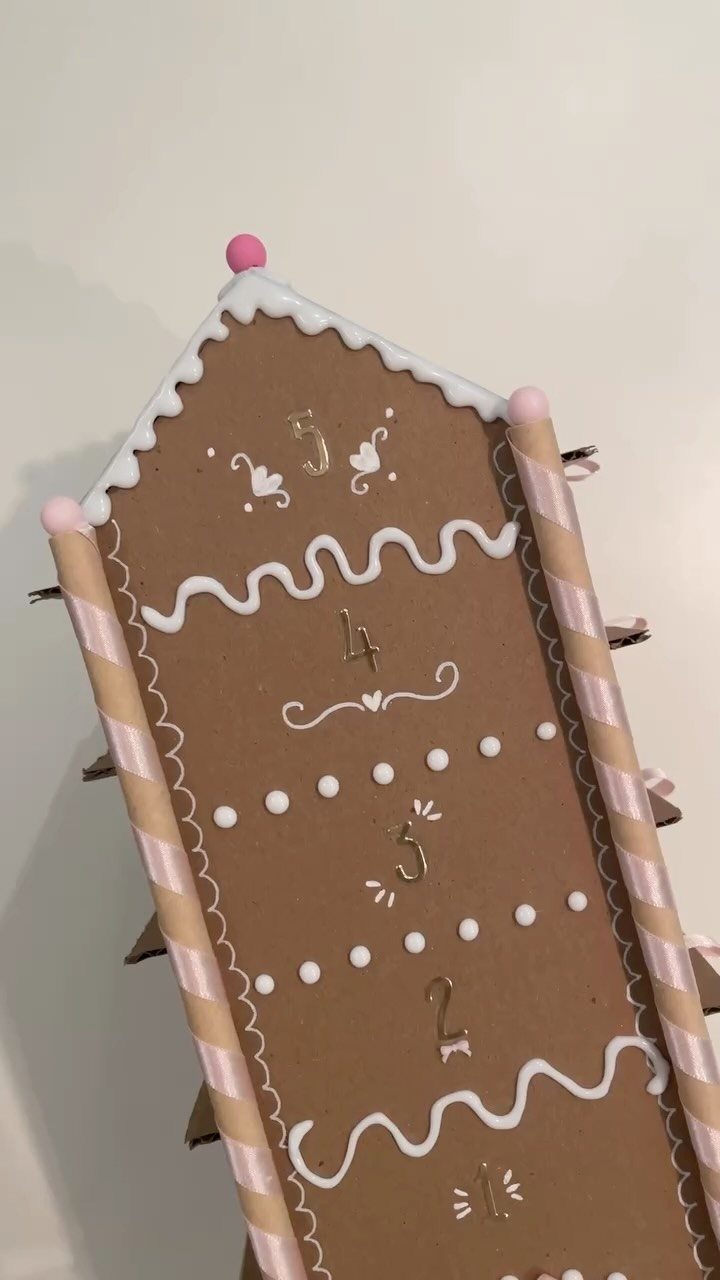
Cardboard makes a gingerbread house without any baking, and white paint stands in for the icing. Brush it along the roof edges and around the windows and door, the way you would pipe frosting.
Striped straws in pink and white make cheerful pillars, and they cost very little.
Cut them to length and glue them upright. Numbers painted on the walls turn the house into a small counting game for kids.
Unlike real gingerbread, it will not crumble or attract ants, so it can sit out all season and come back next year.
Eco-friendly Crafting
Paper decorations have a built-in exit plan. Store them flat for next year, or sort them into the recycling bin when the season ends.
Old wrapping paper and last year’s holiday cards are good raw material, so check your closet before you buy anything. Cards in particular have sturdy stock and printed designs that need no paint.
Keep glue and glitter to a minimum on anything bound for the bin, since heavy coatings can make paper harder to recycle.
If you plan to keep a piece, glue freely; if not, tape or a stapler leaves the paper cleaner.
Christmas paper decorations don’t have to involve complicated instructions and a penchant for crafting.
Family-friendly Activities
Paper is a good project material for a mixed-age group because the supplies are basic: scissors, a glue stick and some pens. Most households already own them.
Match the task to the age. Younger kids can scribble, tear and glue, while older kids and adults handle the cutting and folding.
If your crafters want a head start, print free templates for outlines to trace or color in. That takes a printer and paper, so plan for it before the afternoon starts.
Set up one table with a shared bin of scraps, and the project becomes a family activity rather than a chore for one person.
Budget-friendly Options
Decorating costs add up fast if you have not collected ornaments over the years, and paper is one of the cheapest ways to fill the gap.
Start with what you own: leftover wrapping paper, old cards and printer paper cost nothing.
Spend only on a few extras, such as one pack of colored sheets, then repeat the same colors across every project so the house looks coordinated.
Give each project a small budget before you shop. That keeps a craft table from turning into a shopping trip.
Busy hands at home also solve the evening problem. A stack of paper and a few simple projects keep kids occupied while you finish the rest of your list.